
Quick Start
Connect services
On Connectors, link the services you use. Takes about 10 seconds.
Choose a service. You’ll either be prompted to approve Taco’s access or to provide access information (such as an API key).
When a connector is authorized, Taco will display a message like this and then fetch your tasks:

If you’re brand new to Taco, check out Why Taco exists and how it helps finish the tasks you already have.
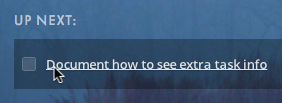
Prioritize
Just click a task and drag it from For Later to Up Next, or vice versa.
Filter by project, list, or due date
Click the gear icon to show tasks related to specific project(s), list(s), status(es), and/or a due date. You’ll see this:
Taco automatically remembers your current view. To permanently exclude certain tasks, see Filters.
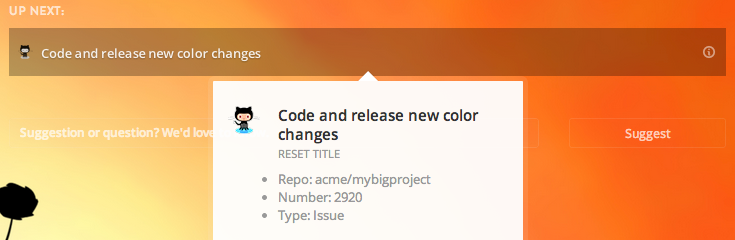
See task details (project name, due date)
To see additional information about most tasks, such as a project name, due date, task list, status, or sender email address, click on the non-text area surrounding the task text. You’ll see a box like this:
These attributes are also searchable, like to see only tasks from a certain service or project within that service.
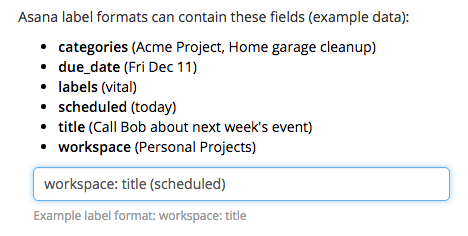
Show details without clicking
Show key info in the task label - no need to click. On Connectors, click a connector’s “Settings” link and scroll to Task Label Format. It looks like this:
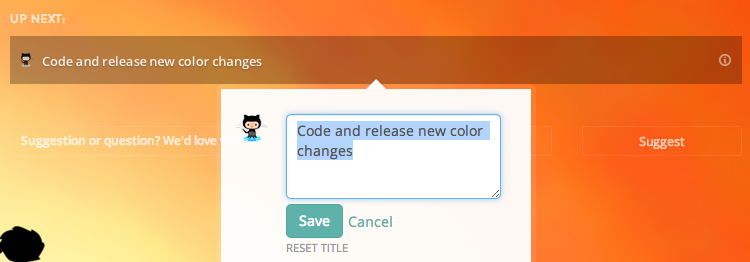
Edit a task label
While viewing the task details, click the task label to edit it to something more meaningful (or reset it back to the label received from the service).
For example, if an email task actually requires a different next action, change the task to say that. You can edit the same task repeatedly as your next action changes.
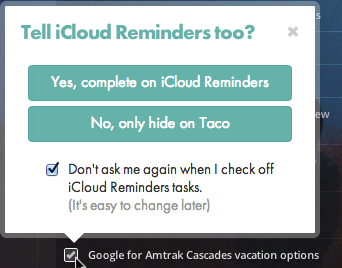
Mark complete
For many services, Taco can update the service when you finish a task. For example, Taco can archive or un-flag an email or check off a to-do in Basecamp.
To mark a task complete, hover over the task and click the checkbox which appears:
If this is the first time you’ve checked off a task from this service, a prompt will ask whether Taco should update the service or simply hide the task on Taco.
Outdated data? Refresh
Taco automatically syncs with connected services:
- hourly while you’re actively using Taco
- daily when you’ve recently used Taco
To tell Taco to immediately retrieve the latest data, click the Sync/Refresh icon in the upper right corner:
![]()
In 10-15 seconds, you’ll see current information.
Focus! Hide the sidebar
Once you’ve chosen 1-3 things to do, hide “For Later.” Either hit \
(backslash) or click the arrow at the far left edge of the screen.
To display “For Later” again, do the same thing. Taco remembers your last-used option.
Top
Did one task suddenly become much more important than it was? Click “Top” to move it to the top of “Up next.”
Can’t act on a task? Hide it
Often other people set priorities for us, or there’s simply items you can’t actually make progress on right now (but aren’t able to delete or complete). Clicking a task’s checkbox can also be used to hide a task in Taco, removing it from Taco’s typical view.
To see hidden tasks, click the “Toggle Hidden Tasks” menu icon in the upper right corner. The icon looks like an eye.
Create a PDF with all tasks, like to print, save, or email it.
Send yourself an email containing “Up Next” items (like the daily punchlist). Taco can also send this every day or week; see Settings - Notifications.
Settings
Visit Settings to add connectors or change preferences.
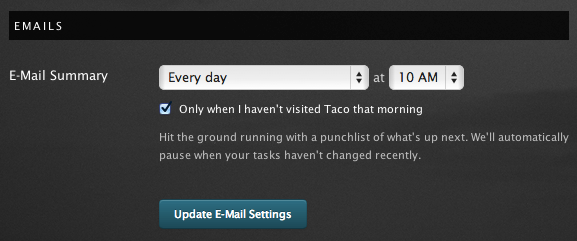
Email summary
Start the day out right with a punchlist of where you left off. Taco can email you what’s up next every weekday, every day, or only on Mondays. We’d put a joke about work-life balance here if we had one.
To enable it, visit Settings - Notifications.
Themes
We want Taco to be an environment you love to work in, so Taco provides a handful of sharp-looking backgrounds. Choose one on Settings - Theme.
Custom theme
To provide your own theme, like a custom background image or color or the URL to your company’s logo, visit Settings - Theme.
To disable distinctive backgrounds entirely, choose a neutral color like white, gray, or black.
Ready to geek out a bit? Keep reading The Rest.